Install Modules in Etendo
Overview
- Search for dependencies
- Set dependencies
- Resolve (download) and install dependencies in sources or jar format
Search for dependencies
- Search for the module that you want to install here.
Info
To log in, use your Nexus Access distributed alongside your license.
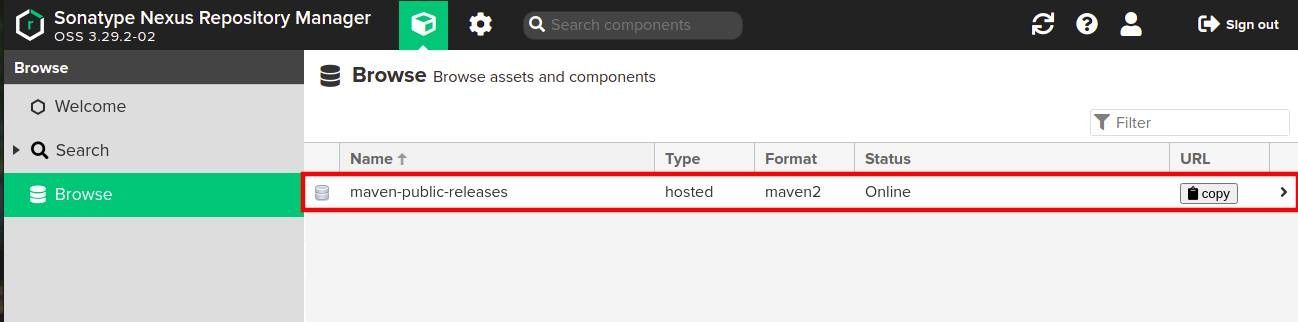
- Go to “Browse” and you can see all the repositories:
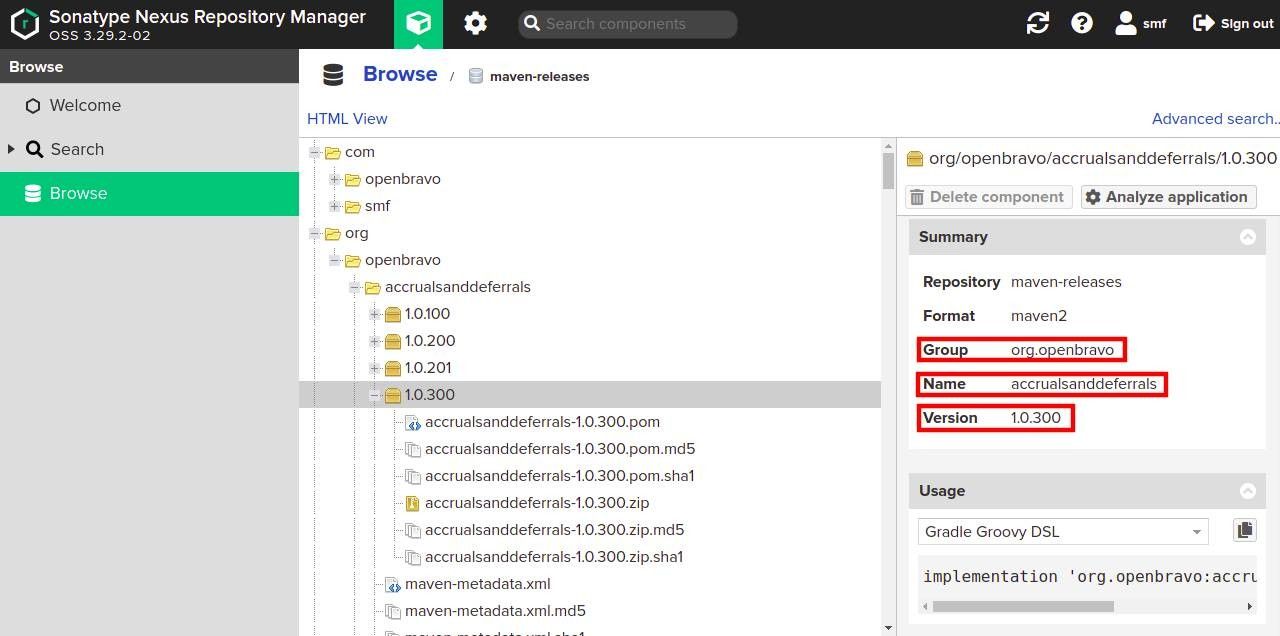
- Inside a repository, you can see all the modules and information (Group, Name and versions):
Set dependencies
Based on the modules format you want to work with, you need to specify differents configurations.
- In your Etendo project, open the
build.gradlefile. - In the dependencies area, declare your modules.
- In the repositories area, you could declare a specific repo url.
Sources
If you want to work with sources modules, declare your dependencies using the moduleDeps configuration. (notice the @zip extension)
dependencies {
    // Add your dependency here
    moduleDeps ('com.etendo:example.module:1.0.0@zip'){ transitive = true }
    moduleDeps group: 'com.etendo', name: 'example.module', version:'[1.0.0,)', ext:'zip', transitive: true
}
JARs
If you want to work with JARs modules, declare your dependencies using the implementation configuration.
dependencies {
    // Add your dependency here
    implementation ('com.etendo:example.module:1.0.0')
    implementation group: 'com.etendo', name: 'example.module', version:'[1.0.0,)'
}
You can declare a specific version (e.g. '1.0.0') or an interval of versions: [begin, end] - Both versions are included (begin, end) - Both versions are not included [begin, ) - From a base version to the latest one
Info
And any other possible combination
Info
You can make use of Gradle exclusion rules to prevent downloading a specific transitive module. Refer to Gradle documentation
Repositories
Warning
It is not necessary to define the maven-releases, maven-public-releases and maven-public-jars repositories, as these are included by default.
In case you want to add new repositories, you must include:
Consistency and conflict resolution
Version consistency
When a new Etendo JAR dependency is added or the version is updated, it is necessary to run an update.database before executing any compilation task (smartbuild, compile.complete, etc).
You can force the compilation tasks adding to the Etendo extension the ignore flag
Or run the tasks with the -PignoreConsistency=true flag.
By default, Etendo will not allow you to add a JAR dependency with an old version to the current installed one. You can ignore this behavior adding the module name to be updated with an old version in the
Conflict Resolution
Etendo will try to perform the conflict resolution strategy offered by GRADLE.
In case of conflicts with the Etendo Core, you can omit the resolution providing the extension flag.
Resolve (download) and Install Dependencies
From Etendo 22Q1, you can install modules in JAR or Sources format.
Sources
To work with sources, you have the expand modules tasks available.
- expandModules
./gradlew expandModules
This task will try to install or update all the modules defined in the moduleDeps configuration.
A menu will be displayed showing the modules that will be expanded, you have to confirm manually to continue with the expansion.
You can manually exclude the expansion of modules adding it in the plugin extension list.
Warning
Transitive dependencies (not declared in the moduleDeps configuration), by default will be extracted, updating or overwriting the source modules if exists. To prevent this behavior, you can set in the plugin extension the flag overwriteTransitiveExpandModules to false
To expand only a custom module, you can use the -Ppkg flag and have defined the module in the moduleDeps configuration
./gradlew expandModules -Ppkg=com.etendoerp.custommodule
Only the defined module will be updated or installed.
Info
Transitive dependencies will not be updated or installed.
JARs
To work with JAR modules, you need to resolve the dependencies running
Finally, install or update the database with the new modules
Info
Restart the Tomcat server and check the installation.
Info
The module is ready to use in Etendo!
Installing translation modules
If you want to install translation modules, you have to follow some more steps. The translation modules are installed automatically when you compile the code for first time. E.g. after running ./gradlew install command to create a new client's instance.
But if you want to update a translation module version you can execute:
Info
install.translation task change the module status to be installed in the next smartbuild.
Another option to force the installation of all the translation modules is to add the forceRefData=true property in the Openbravo.properties file and then run: